
Recently, I decided to make an Alexa skill that I could play on my boss’s Alexa. At first, I was doing it as a gag, but I figured that wouldn’t work as he has to actively install my skill onto his Alexa. Now it reads some stats from one of our Azure databases and publishes those in a conversation. Here’s how I built it.
Step 1: Creating the Alexa Skill Model
I don’t know any of the other languages that you can write a skill in, so I chose to write it in C#. That means getting a bunch of bits and loading them into Visual Studio. But first, you’ll need to start the process of creating a skill. At the time of this writing, these are the steps I took.
- Start Here.
- Click the Start a Skill button.

- If you don’t have an Amazon Developer account, create one.
- Eventually, you’ll get to the Alexa Skills Developers Console where you can click the Create Skill button.

- Give your skill a name. I’m calling mine: Simon’s Example Skill.
- On the Choose a Model screen, select Custom.

- Then click Create Skill.
- You should now be on the Build tab for your Skill. Notice the tree view on the left and the checklist on the right.

Invocation Name
The Invocation Name is the phrase that an Alexa user will use to launch/run/start your Alexa Skill. It could be “joe’s hot dog recipes” or some such. It needs to be lower case, there are some restrictions on the characters you can use, and any abbreviations you use need periods to separate the letters so Alexa knows to read the letters and not pronounce the word. Read the Invocation Name Requirements for more details.
Click the Invocation Name link in the tree view on the left or the first option in the checklist on the right. Then give your skill an Invocation Name. I named mine: “simon’s example”.
Intents
The Intents are the various functions your skill can perform. For example, stating today’s date, looking up some data, figuring something out, etc. Let’s do all three.
First, my skill is going to provide today’s date, so I’m going to name my first Intent, “GetTodaysDateIntent”. My skill is also going to look up some data in an Azure SQL Database, so I’m going to name my second Intent, “DataLookupIntent”. Lastly, I want to figure something out, like the average temperature in a major US city.
Utterances
The Utterances are the phrases an Alexa user might say to trigger your Intent (function). You should put in several Utterances using synonyms and different phrasing so Alexa has a better chance of triggering your Intent instead of responding with “I don’t know how to do that.”
For the GetTodaysDateIntent, I added the following utterances:

Slots
Within an Utterance, you can have Slots (or placeholders), that represent the multiple options for that slot. For example, if my table has the count of animals per household per neighborhood per county in it, I might want to create slots for Animal Type, Household Size, Neighborhood Name, and County Name. You can do this by typing a left brace { in the Utterance box.
Here are three of my sample utterances for the DataLookupIntent:

Once you have created a slot, you need to populate it with options. You do this in the bottom half of the Utterance screen.

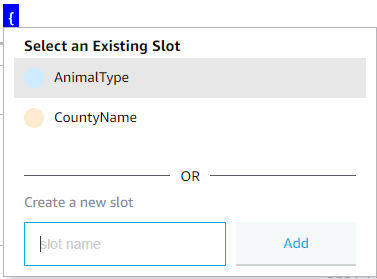
You can easily select one of the pre-defined Slot Types in the drop-down. In my case, Amazon has a list of Animals, so I’ll pick AMAZON.Animal in the first slot.
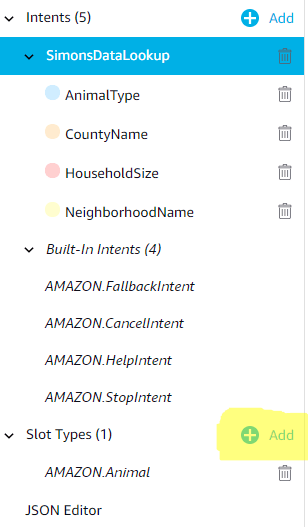
I need to manually add a few Counties for the second slot though. And at this time, you don’t want to click Edit Dialog (though it’s tempting). Instead, you want to define your own Slot Type by clicking the Add (Plus) button next to Slot Type in the tree view on the left:
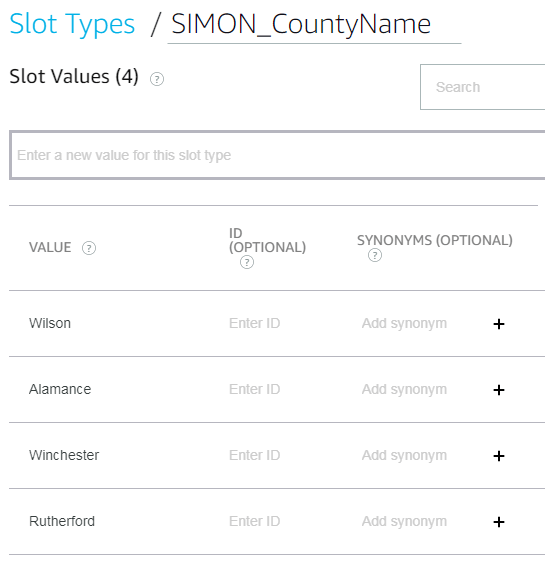
For example, here is the custom Slot Type for County Name:
Notice the synonyms column. This is important if there are synonyms, for example, a 1 person household and a single person household are synonymous. So be certain to add any synonyms you can think of. Here is my custom Slot Type for Household Size, notice the synonyms off to the right:

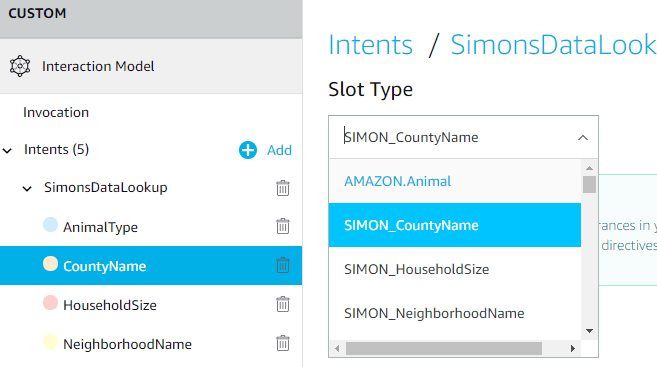
Now that you’ve defined some custom Slot Types, you can click on the Slot names under the Intent in the tree view on the left and select the newly created Slot Type for each Slot.
For the GetAverageTemperatureIntent, I added one Utterance:

And configured the {City} slot as follows:

Finally, you can Save your Model and Build it by clicking the buttons at the top of the screen:
Hopefully, the model will build and we are ready to move on to Step 2. If the model doesn’t build, check the bottom right of the screen for a list of the errors:
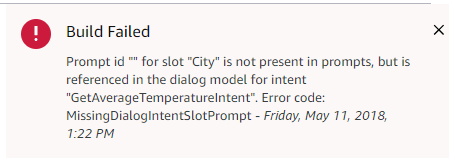
Fix the errors until the model builds:

Then go to Step 2.

[…] If you haven’t done so already, check out Step 1 to define your Alexa Skill. […]
[…] that you’ve defined your Alexa Skill in Step 1, and you’ve configured the security and downloaded the sample in Step 2, we’re ready to […]
[…] we created the Lambda function that will provide the functionality of the Alexa Skill we defined in Step 1, we wired everything up and then we tested our Skill. So far so good. However, that’s an […]
[…] rolls. Lambda functions can be written in a variety of languages. I’ve blogged before about using C# to do this. (Note: Using C# is now SOOO much easier as the Lambda Function tools in AWS have been updated […]