
So far we’ve defined, gathered and installed the requisite tools in Part 1. We’ve defined the Skill we’re creating in Part 2. And, we’ve created the Intents for our skill in Part 3.
Now, we will code the Lambda function that is the brains of our skill in this entry, Part 4.
What is a Lambda Function?
Amazon Web Services (AWS) calls the functions you create in their cloud “Lambda Functions.” For the purposes of Alexa skills, these functions are the brains behind the skill. Alexa takes care of the speech part of the skill, and figures out how to interpret the Alexa User’s spoken words and which intent to choose and slots to fill based on those words, but you then have to make your Alexa skill actually do something to fulfill the intent you created on the Alexa side of your Skill development process. In my case, that means writing a function that can roll some dice and add or subtract and specified modifier to the rolls.
Lambda functions can be written in a variety of languages. I’ve blogged before about using C# to do this. (Note: Using C# is now SOOO much easier as the Lambda Function tools in AWS have been updated to use .Net Core as a standard platform.) Today, I am using JavaScript (node.js). Other options include Python, Java and Go.
A Little More Cleanup First
In our VS Code project, in the \lambda\custom folder is a file named package.json. We need to correct the name of our package here. My skill is called “Roll Some Dice” so I’ll have to name my code package “roll-some-dice”. Note the lower case and replacing spaces with dashes.
{
  "name": "hello-world",
  "version": "1.0.0",
  "description": "",
  "main": "index.js",
I’m going to simply replace “hello-world” with “roll-some-dice” and save and close the file.
{
  "name": "roll-some-dice",
  "version": "1.0.0",
  "description": "",
  "main": "index.js",
In that same folder, is a file named package-lock.json. We need to make the same edit to that file. So:
{
  "name": "hello-world",
  "version": "1.0.0",
  "lockfileVersion": 1,
Becomes:
{
  "name": "roll-some-dice",
  "version": "1.0.0",
  "lockfileVersion": 1,
One More Thing Before We Can Code
In order to roll a dice, we need a random number generator. This can be found in the node.js module named i18next. We will also need the module named i18next-sprintf-postprocessor. To get these, we will use the npm package manager.
On the left side of the VS Code screen, right click on the “custom” folder in the basic skill template and choose “Open in Terminal”:

In the bottom right of the VS Code screen is the Terminal panel. When you get to the command prompt:

Type in the commands “npm install i18next” and then “npm install i18next-sprintf-postprocessor“:
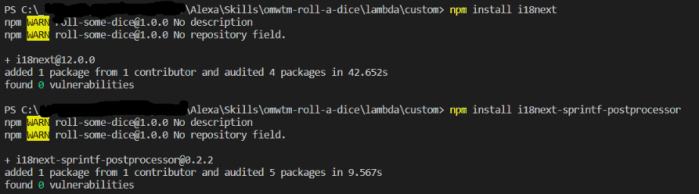
Once completed, you should have a couple of new folders in the “custom\node_modules” folder of your project:

Finally, the Brains of the Operation (index.js)
Since we just added the modules above to the project, let’s also add them to index.js, then I’ll discuss what’s in there and what we need to do.
Include the i18next Modules in index.js
At the top of the index.js file, we need to include the i18next modules. This is done by adding new constants for them below the Alexa constant, like so:
const Alexa = require('ask-sdk-core');
const i18n = require('i18next');
const sprintf = require('i18next-sprintf-postprocessor');
A Brief Tour of index.js
After the constants declared at the top of the file to include the required modules, there are several “Handler” functions. The first is the LaunchRequestHandler:
const LaunchRequestHandler = {
  canHandle(handlerInput) {
    return handlerInput.requestEnvelope.request.type === 'LaunchRequest';
  },
  handle(handlerInput) {
    const speechText = 'Welcome to the Alexa Skills Kit, you can say hello!';
    return handlerInput.responseBuilder
      .speak(speechText)
      .reprompt(speechText)
      .withSimpleCard('Hello World', speechText)
      .getResponse();
  },
};
Each of the Handler functions handles one specific request from the user to Alexa. In this case, it the LaunchRequestHandler can handle requests with a type of “LaunchRequest”. When this Handler is fired, it builds a response that is sent back to the user. This response includes some speech (what Alexa will say), a reprompt (what she will say to remind the user what to do, and a Card (to be displayed on the Echo Show and other devices with screens).
The other Handler functions are set up to handle the different intents of the skill:
- HelloWorldIntentHandler – The main intent handler
- HelpIntentHandler – Handles the case where the user asks Alexa for help
- CancelAndStopIntentHandler – Handles Alexa, Stop and Alexa, Cancel\
- SessionEndedRequestHandler – Handles the final request sent to the skill when the session ends
- ErrorHandler – Handles any error situations
Next, we get to the lines that export the various Handlers so that the Alexa SkillBuilder knows which functions to call:
const skillBuilder = Alexa.SkillBuilders.custom();
exports.handler = skillBuilder
  .addRequestHandlers(
    LaunchRequestHandler,
    HelloWorldIntentHandler,
    HelpIntentHandler,
    CancelAndStopIntentHandler,
    SessionEndedRequestHandler
  )
  .addErrorHandlers(ErrorHandler)
  .lambda();
What We Need to Change
First, we will change the LaunchRequestHandler, as shown in bold, blue text below:
const LaunchRequestHandler = {
  canHandle(handlerInput) {
    return handlerInput.requestEnvelope.request.type === 'LaunchRequest';
  },
  handle(handlerInput) {
    const speechText = 'Welcome to Roll Some Dice.  You can say, Roll 2 Dice, or Roll 4 Dice plus 1!';
    return handlerInput.responseBuilder
      .speak(speechText)
      .reprompt(speechText)
      .withSimpleCard('Roll Some Dice', speechText)
      .getResponse();
  },
};
Next, we will fix the Card lines in all the other intents so that this:
.withSimpleCard('Hello World', speechText)
becomes:
.withSimpleCard('Roll Some Dice', speechText)
Next, we will change the Help Speech Text in the HelpIntentHandler to:
const speechText = 'You can say roll 2 dice, roll 3 dice plus 1, roll 6 dice minus 1 or any number of dice with any modifier.';
Next, we will completely change the HelloWorldIntentHandler. We will do this in stages. First, we need to change the name of the Handler and its corresponding entry in the SkillBuilder at the bottom of the file, like so:
const RollSomeDiceIntentHandler = {
  canHandle(handlerInput) {
    return handlerInput.requestEnvelope.request.type === 'IntentRequest'
      && handlerInput.requestEnvelope.request.intent.name === 'RollSomeDiceIntent';
  },
  handle(handlerInput) {
    var speechText = 'Hello World!';
    return handlerInput.responseBuilder
      .speak(speechText)
      .withSimpleCard('Roll Some Dice', speechText)
      .getResponse();
  },
};

...

const skillBuilder = Alexa.SkillBuilders.custom();
exports.handler = skillBuilder
  .addRequestHandlers(
    LaunchRequestHandler,
    RollSomeDiceIntentHandler,
    HelpIntentHandler,
    CancelAndStopIntentHandler,
    SessionEndedRequestHandler
  )
  .addErrorHandlers(ErrorHandler)
  .lambda();
Now, we have a Handler for our Intent that doesn’t actually do what it needs to do.
But, we do have a Handler. At this point, we can deploy and test our Skill.
Deploying Your Skill to Alexa Developer Console and Amazon Web Services
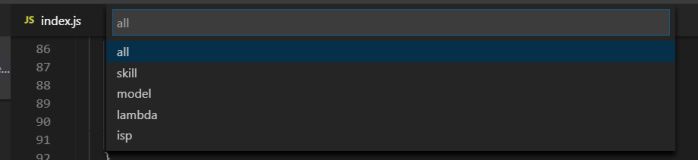
It turns out, that with the ASK in VS Code, deploying our Skill to Alexa and Amazon is quite easy. Open the Command Palette (View | Command Palette…). Type ASK. Select Deploy the skill.

Wait a moment while the ASK initializes, then select the default profile:

Then select “All”:
Now, it will try, and probably fail, to deploy. If it succeeds, great. If it fails, you probably need to change the working directory in the Terminal window at the bottom right of VS Code. This is done with the CD command, like so:

Once you’ve changed the directory to the one with your skill in it, press the up arrow on the keyboard a couple of times to get the “ask deploy” command back. Then press enter.
If all goes well, a few moments later, your skill will be deployed:

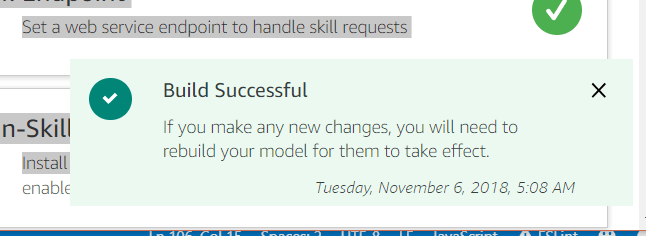
Now that your skill is deployed, we can switch over to the Alexa Developer Console to test it. If you still have your template project open from earlier, click “Your Skills” in the top left corner. Then you will see your newly deployed skill at the top of the list:

Click the Edit link on the far right. On the Build tab, you should see a little popup saying your build was successful:
Click on the Test tab. If it’s not enabled, enable testing for this skill:

In the Alexa Simulator, type in “start Roll Some Dice and roll 2 dice”. Press enter.
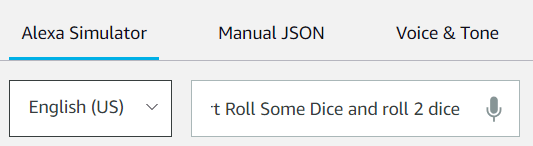
Alexa should say, “Hello World”. (Remember, we haven’t actually told her how to roll some dice yet.)

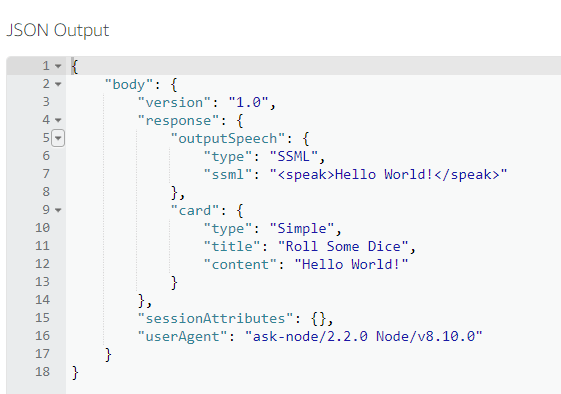
Notice the JSON Output from your Skill code in index.js:
And scroll down to see the Card visual that would be shown on the Echo Show:

That’s it for now. In the final post in this series, I will teach Alexa to roll dice with a modifier and report the results.
