
The Skill Model (en-US.json)
Open the en-US.json file in the models folder. Notice the areas I’ve highlighted in bold, red text. These are things we will change.
{
  "interactionModel": {
    "languageModel": {
      "invocationName": "greeter",
      "types": [
      ],
      "intents": [
        {
          "name": "AMAZON.CancelIntent",
          "samples": [
          ]
        },
        {
          "name": "AMAZON.HelpIntent",
          "samples": [
          ]
        },
        {
          "name": "AMAZON.StopIntent",
          "samples": [
          ]
        },
        {
          "name": "HelloWorldIntent",
          "slots": [
          ],
          "samples": [
            "hello",
            "say hello",
            "say hello world"
          ]
        }
      ]
    }
  }
}
First, the invocation name. This is the name by which users will invoke your skill and it should be the same as the name of the skill you put in the skill manifest. In my case, in Part 2 I named the skill “Roll some dice”. The invocation name has to follow these rules:
- Your invocation name should be two or more words
- Can contain only lower-case alphabetic characters, spaces between words, possessive apostrophes (for example, “sam’s science trivia”), or periods used in abbreviations (for example, “a. b. c.”).
- Other characters like numbers must be spelled out. For example, “twenty one”.
- Invocation names cannot contain any of the Alexa skill launch phrases.
I will enter the invocation name as “roll some dice”.
"invocationName": "roll some dice",
There are three AMAZON intents in the basic skill template. Those are fine the way they are and should not be modified.
The meat of the skill model is your intent. In the basic skill template, this is the HelloWorldIntent. We will change this.
Using the Alexa Developer Console to build the JSON for an Intent
The easiest way to get the correct syntax for the Skill Intent is to use the Alexa Developer Console.
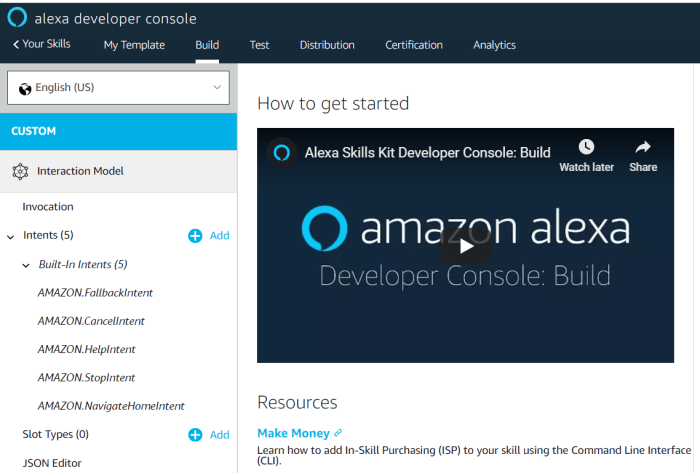
1. Log in and click Create Skill. Enter the name “My Template”. Pick Custom as the type. On the next page, click Start from Scratch as the template. You should end up here:
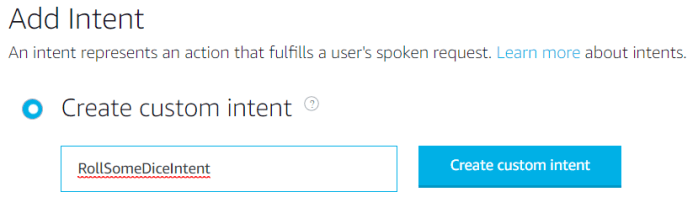
2. Next to Intents, click Add. Intent name can only contain case-insensitive alphabetical characters and underscores, and it must begin and end with an alphabetic character. Numbers, spaces, or other special characters are not allowed. I will name my intent “RollSomeDiceIntent”:
3. Next, you enter the sample utterances. This is what the Alexa User needs to say to make your skill work. In my case, I have entered four utterances:
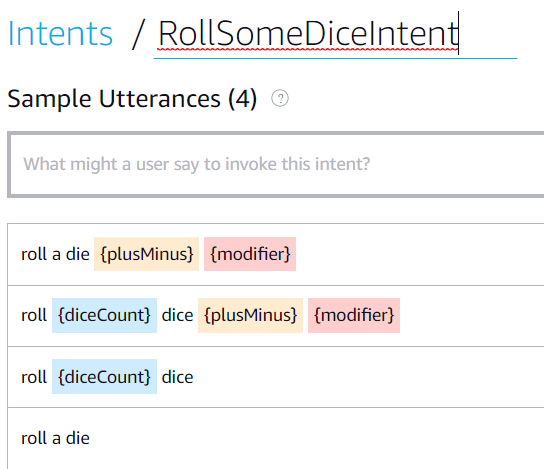
Notice how I used braces { } to create “slots” (or variables). These slots are placeholders for where the user can say a matching word. For example, “Roll 10 dice plus 1” matches the second utterance “roll {diceCount} dice {plusMinus} {modifier}“.
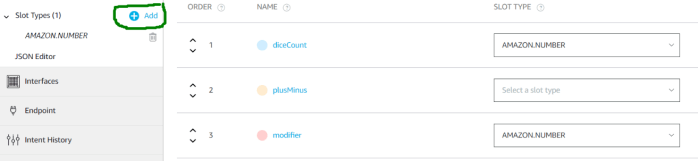
4. Now we need to define the slot types for the slots we named in the utterances. This is done at the bottom of the sample utterances page. Scroll down a bit and you will see this:
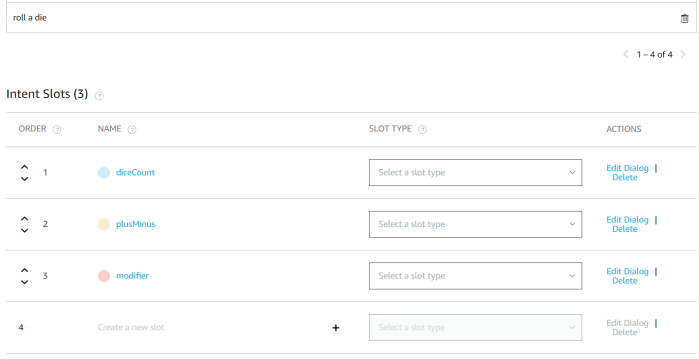
For the Slot Type, the first and third slot (diceCount and modifier) are both numeric, so pick AMAZON.Number from the drop down. You can type AMAZON.N and it will show AMAZON.Number as the only choice if you want to save on scrolling.
For the other slot, plusMinus, we will want to make a custom slot type where it only responds to “plus” and “minus”. Do this by clicking the Add button next to the Slot Type menu on the left side of the screen:
Give your new slot a name. Note: You cannot use a period in your name. Amazon can, but you can’t. So use an underscore. I will name my slot: OMWTM_PlusMinus:

Next, enter the words that are valid in your slot. For me, that is plus and minus. I will also add the synonyms add and subtract, just in case the user gets creative. Note: Make sure you click the plus sign next to the synonym so it actually gets saved into the slot. The slot ends up looking like this:

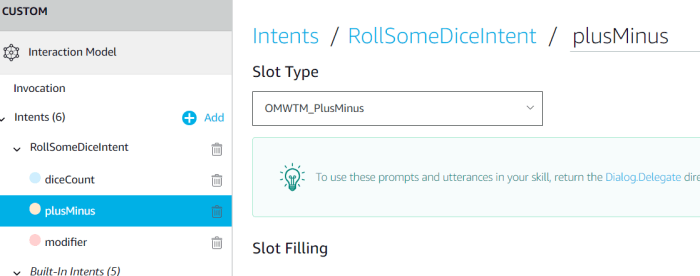
Finally, click on a the {plusMinus} slot in the left panel and select your custom slot type as the slot type:
- Now we’ve defined the intent, with sample utterances and slots. Next, we need to get the JSON for the intent and copy it over to the en-US.json model file in VS Code. The JSON for your intent is in the Alexa console under the JSON Editor menu option on the left side:
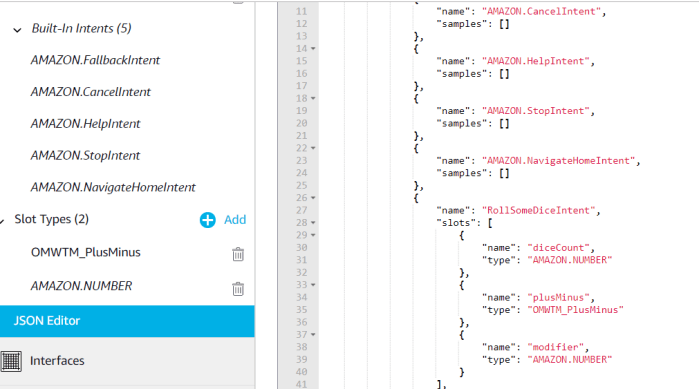
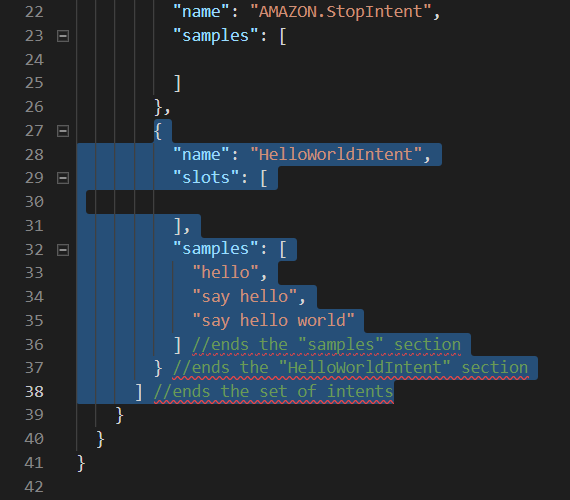
We want ONLY the custom intent and the slots, so scroll down past the AMAZON intents and find the section that defines your intent:
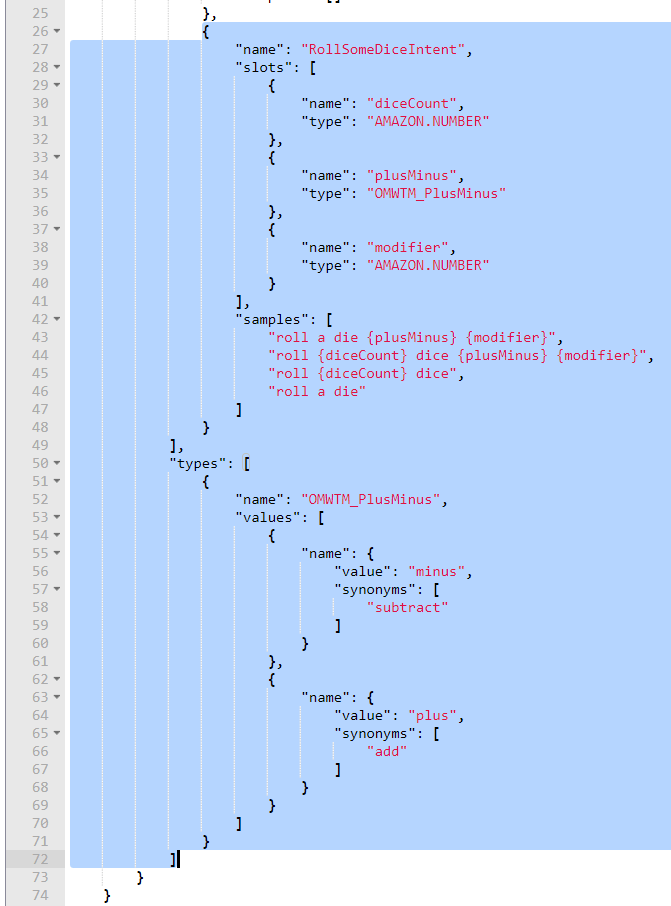
Copy the highlighted section over to the model file in VS Code. Note: When you paste it in, you will be replacing the last braces of the intents section. If you don’t, your JSON file won’t have the right number of braces. I.e. Delete the HelloWorldIntent in its entirety and delete the extra square brace below it that ends the set of intents:
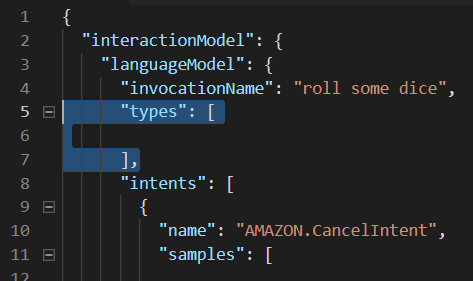
Also, the basic skill template inserts a blank types section at the top. Delete this too:
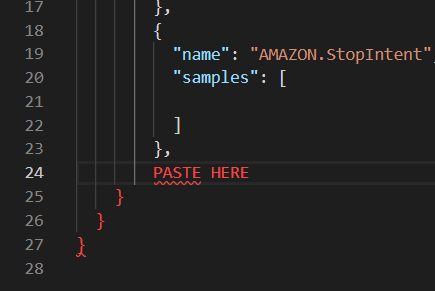
Now, back at the bottom of the file, paste in the copied text from the Alexa console:
The finished intent model should look like this:
{
    "interactionModel": {
        "languageModel": {
            "invocationName": "roll some dice",
            "intents": [{
                    "name": "AMAZON.CancelIntent",
                    "samples": [
                    ]
                },
                {
                    "name": "AMAZON.HelpIntent",
                    "samples": [

                    ]
                },
                {
                    "name": "AMAZON.StopIntent",
                    "samples": [

                    ]
                },
                {
                    "name": "RollSomeDiceIntent",
                    "slots": [{
                            "name": "diceCount",
                            "type": "AMAZON.NUMBER"
                        },
                        {
                            "name": "plusMinus",
                            "type": "OMWTM_PlusMinus"
                        },
                        {
                            "name": "modifier",
                            "type": "AMAZON.NUMBER"
                        }
                    ],
                    "samples": [
                        "roll a die {plusMinus} {modifier}",
                        "roll {diceCount} dice {plusMinus} {modifier}",
                        "roll {diceCount} dice",
                        "roll a die"
                    ]
                }
            ],
            "types": [{
                "name": "OMWTM_PlusMinus",
                "values": [{
                        "name": {
                            "value": "minus",
                            "synonyms": [
                                "subtract"
                            ]
                        }
                    },
                    {
                        "name": {
                            "value": "plus",
                            "synonyms": [
                                "add"
                            ]
                        }
                    }
                ]
            }]
        }
    }
}
That’s it for now. In the next post, we’ll start looking at the Lambda function files and what needs to be changed there to get this skill working.
Bye for now.

[…] So far we’ve defined gathered and installed the requisite tools in Part 1. We’ve defined the Skill we’re creating in Part 2. And, we’ve created the Intents for our skill in Part 3. […]