
Now that you’ve defined your Alexa Skill in Step 1, and you’ve configured the security and downloaded the sample in Step 2, we’re ready to take a look at the sample and see how to wire it up to the skill definition.
Open your copy of the sample solution in Visual Studio 2017. I left my copy in this folder:
C:\_GitHub\Alexa\MyAlexaSkill\sampleFactCsharp.sln
At this point, I had a decision to make: Do I start a new project and copy the stuff from the sample project, or do I just mess with the sample project? I think I’ll actually create a new project, and leave the sample in pristine condition for comparison.
Creating the Alexa Skill Project from the Sample
First, create a new project in the solution, choosing AWS Lambda Project with Tests as the template:
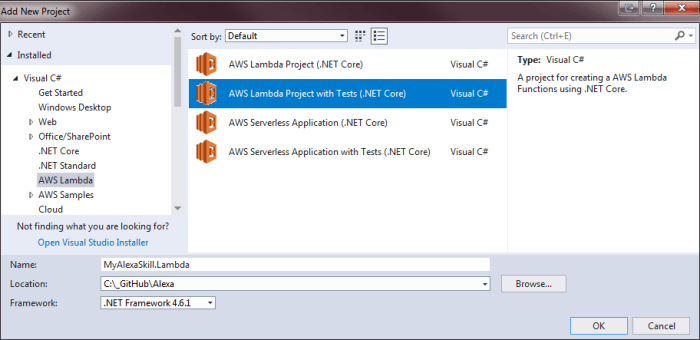
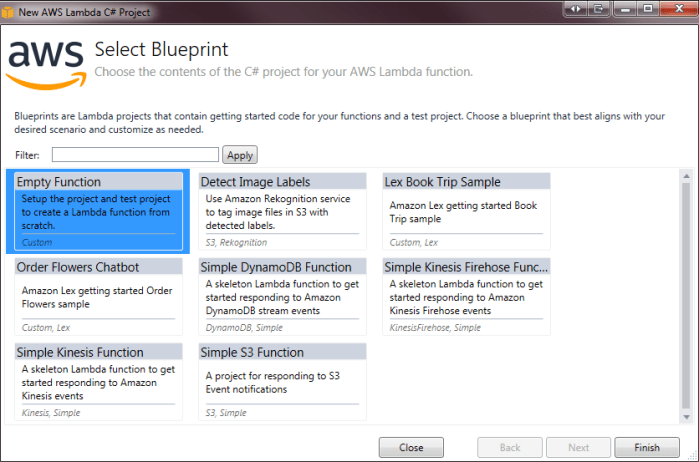
We want an Empty Function:
Now that we have our own project, let’s check out the dependencies:
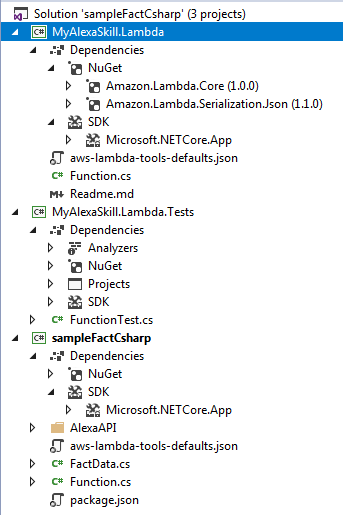
As of this writing, the NuGet package for Amazon.Lambda.Serialization.Json needs updating. So I did that. Also, the sample is for .NetCore 1.0. My project has defaulted to using .NetCore 2.0. I don’t expect this to be a problem.
Next, I might as well copy the code (both classes) and the AlexaAPI folder from the sample to my project. This will at least give me a starting point.
Coding for the Alexa Intents
Now that the project is set up, we can start coding for the Intents in the Alexa Skill we created in Step 1. To start off, we will crack open the Function class in our new project and locate the ProcessIntentRequest() function. There’s a switch statement there that will handle our simplest Intent Request, which was GetTodaysDateIntent, like so:
switch (intentRequest.Intent.Name)
{
    case "GetTodaysDateIntent":
        innerResponse = new SsmlOutputSpeech();
        (innerResponse as SsmlOutputSpeech).Ssml = $"Today's date is {DateTime.Today.ToString()}";
        break;

    case "GetNewFactIntent":
        innerResponse = new SsmlOutputSpeech();
        (innerResponse as SsmlOutputSpeech).Ssml = GetNewFact(factdata, true);
        break;
   ...
At this point, you’ll probably want to do a build and deployment to AWS. First, make sure your project builds.
Creating an AWS Profile
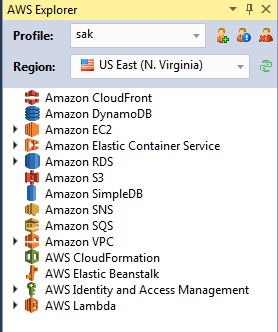
Next, you need to set up a Publish Profile in AWS. This is done by viewing the AWS Explorer on the left side of your VS screen and clicking the New Account Profile icon.
That will bring up the New Account Profile dialog.
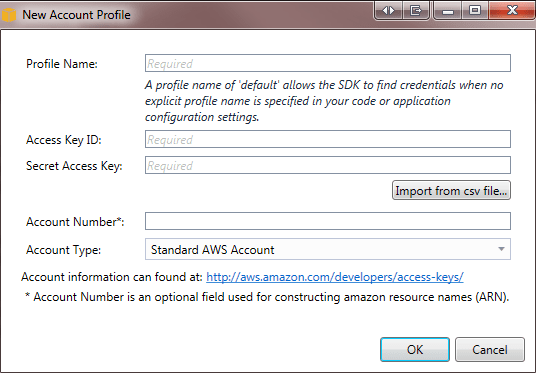
Click the link near the bottom of the dialog to go to the documentation on how to add a user. Then click on one of the links that open the Console to IAM. Or just click on the link here.
Next, select the Users category on the left. Then create a Deployment User that has programmatic access and is in the Developers group we created in Step 2.

When you click Create User, you will see the Success screen. Be sure to click the Download .csv button (middle-left) to get the credentials file. You can never get this file again, you will have to create a new Access Key and get a new credentials file.

Now, back in Visual Studio, click the Import from csv file button:
Give your profile a name, I called mine Deployment. Account Number is optional and can be left blank. Then click OK. You will see the AWS Explorer switch to the Deployment profile. You should then pick the default profile and delete it.

Publishing Your AWS Lambda Project
You are now ready to publish your AWS Lambda project. Right-click on the project and select Publish to AWS Lambda….
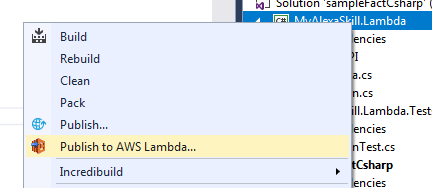
If you don’t see this menu option, make sure you’re in the Lambda project, not the Test project. Then, make sure you have installed the AWS Toolkit as described in Step 2.
When you see the publish dialog, give your function a name:
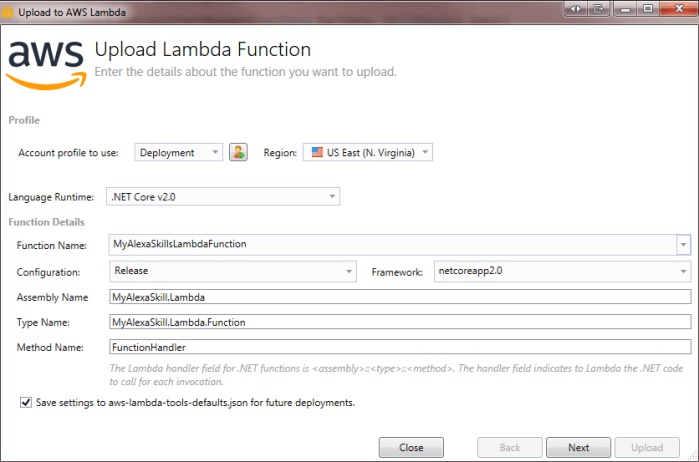
Then click next and pick the Role we defined in Step 2.

Then click Upload. After a few moments, your Lambda function will be uploaded.
Uh-Oh. Duplicate Compile Items
If you get the Duplicate Compile items error:
Duplicate Compile items were included. The .NET SDK includes Compile items from your project directory by default. You can either remove these items from your project file, or set the ‘EnableDefaultCompileItems’ property to ‘false’ if you want to explicitly include them in your project file.
The recommendation is to remove the Compile items from your project (*.csproj) file. Right-click the project and choose to Edit your .csproj file:

Then delete all the *.cs files from the Compile section:

I also deleted the ItemGroups above that because they had Compile items in them too. Now my project builds and deploys properly, and my .csproj file is much cleaner:

Now publish the fixed project to AWS.
Back on Track: Wiring up the Skill and the Lambda function.
Alright, we have a Skill defined. We have a Lambda function uploaded. Now we need to tell them each about the other. First, we’ll tell the Skill about the Lambda function.
Go to the Lambda functions list in the Lambda Management Console. Click on your new Lambda function, which I named MyAlexaSkillsLambdaFunction. In the top right corner of the screen you will see the ARN:

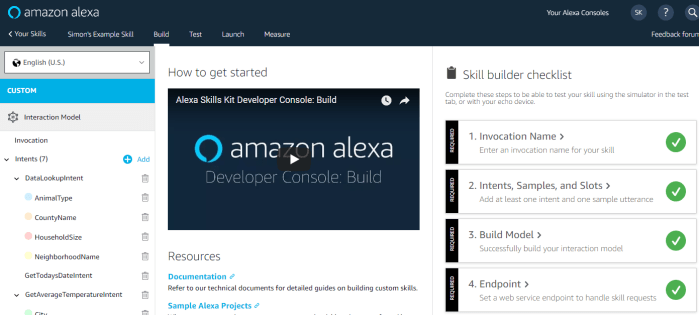
Copy the ARN to the clipboard and paste it into Notepad. Now, switch over to the Alexa Skill Console. Select your skill. Click on the Build tab. Click on the big “4. Endpoint >” button in the checklist on the right.
Paste the ARN from the Lambda Function into the Default Region box on the right.

Then, copy the Skill ID above it to the clipboard and paste that into Notepad too.
Switch back to the Lambda Management Console. Under the Add Triggers list on the left, find the Alexa Skills Kit and drag it over to the Triggers area of your Lambda function:

Then scroll down to configure the trigger and paste in the Skill ID you copied from the Skill and click the Add button:

Lastly, in the top right corner of the Lambda screen, click the Save button:

And that’s that. The Alexa Skill is defined, the Lambda function is defined. The two know about each other. You are ready to test your skill.
Testing the Alexa Skill
To test your Alexa Skill and make sure everything is wired up properly, click on the Test tab in the Alexa Console. Then enable testing for this skill.

In the Alexa Simulator panel, in the text entry box, run your Skill:

Alexa should respond with the Launch Message from your skill (which we will modify in a later Step in this series):

Now, test your Skill’s Intent:

Alexa should tell you the date:

Tada! That’s it for Step 3.
Check out Step 3a to see how to Unit Test your Alexa Skill Intent without publishing anything to AWS.
In Step 4, we will look at setting up a Web Service project to feed data from an Azure SQL database to our Alexa Skill.

[…] Step 3, we will look at the sample solution and start to modify it to work with the skill we defined in […]
[…] Step 3, we created the Lambda function that will provide the functionality of the Alexa Skill we defined […]