

Cast Iron Cookware
What is a Dutch Oven?
A Dutch oven is a thick-walled cooking pot with a tight-fitting lid. Dutch ovens are usually made of seasoned cast iron; however, some Dutch ovens are instead made of cast aluminium, or ceramic. Some metal varieties are enameled rather than being seasoned (see next section).

Acquiring a Dutch Oven
You can start your Dutch Oven journey at Walmart or Amazon.


Dutch Ovens come in many shapes and sizes. Typically, in Scouting, we use standard 10-inch diameter (4 Quart) and 12-inch (6 Quart) ovens.
You want to make sure you get a flanged lid for putting coals on top. Some dutch ovens are for home use and have dome style lids.
What else do I need?
How much money do you have to spend?

In order of preference, I recommend the following:
- A Lid Lifter $5-10 (while the right stick can work, a lid lifter is very handy)

- Charcoal Starter/Chimney $10-20

- Welding gloves $15-20

- Dutch Oven Care Kit – Scrubber, Scraper, Oil, Cast Iron Soap $15-50


- A Boy Scout Firestarter $40

Preparing your Dutch Oven for Use
Great news! Your cast iron cookware is probably pre-seasoned at the factory so you can just dive in and use it. If it is, skip ahead the next part
Seasoning your Dutch Oven
Seasoning is the process of treating the surface of a cooking vessel with heated fat in order to produce a corrosion-resistant and stick-resistant coating.
Food sticks easily to a new bare metal pan; it must either be oiled before use, or seasoned. The coating known as seasoning is initially created by a process of layering a very thin coat of oil on the pan. Then, the oil is polymerized to the metal’s surface with high heat for a time. The base coat will darken with use. This process is known as “seasoning”; the color of the coating is commonly known as its “patina”.
To season a pan (e.g., to season a new pan, or to replace damaged seasoning on an old pan), the following is a typical process:
- cleaning the cookware to remove residues from manufacturing or manufacturer-applied anti corrosion coating and expose the bare metal,
- applying a thin layer of animal fat or cooking oil (ranging from vegetable oil to lard, including many common food-grade oils), and
- heating the cookware to generate the seasoned coating.[5][6][7][8]
If it is not pre-seasoned, a new cast iron skillet or dutch oven typically comes from the manufacturer with a protective coating of wax or shellac, otherwise it would rust. This needs to be removed before the item is used.[9] An initial scouring with hot soapy water will usually remove the protective coating. Alternatively, for woks, it is common to burn off the coating over high heat (outside or under a vent hood) to expose the bare metal surface. For already-used pans that are to be re-seasoned, the cleaning process can be more complex, involving rust removal and deep cleaning (with strong soap or lye,[10] or by burning in a campfire or self-cleaning oven[11]) to remove existing seasoning and build-up. Once the pan has been heated, dried, and thinly layered with oil or fat, it is placed in an oven, grill, or other heating enclosure for the oil to be polymerized onto the metal’s surface. The process of polymerization is dependent on the oil, temperature of the enclosure, and the duration. The precise details of the seasoning process differ from one source to another, and there is much disagreement regarding the correct oil to use. There is also no clear consensus about the best temperature and duration. Lodge Manufacturing uses a proprietary soybean blend in their base coats as stated on their website. Others use lard, or animal fats. Some advocate the use of food-grade flaxseed oil (a drying oil).[12] The temperature recommended for seasoning varies from high temperatures above 260 °C (500 °F) to temperatures below 150 °C (302 °F). Some say that a temperature around the smoke point of the oil or fat should be targeted since this will allow vaporization of the lighter hydrocarbons from the oil, leaving behind heavier molecules for optimal polymerization and carbonization to occur. And, there is also no consensus on the correct duration of heating: from half an hour to an hour is often recommended.
Storing your Dutch Oven
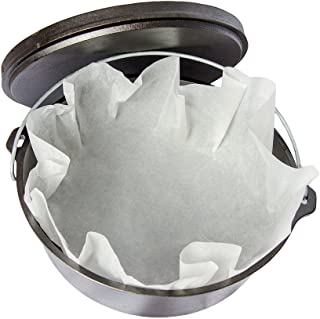
After use Dutch ovens are typically cleaned like other cast-iron cookware: with boiling water, and a soft brush or sponge. Where possible, a cleaned and freshly oiled Dutch oven should be stored in a clean, dry location with the lid ajar or off to promote air circulation and to avoid the smell and taste of rancid oil. If the Dutch oven must be stored with the lid on, a paper towel or piece of newspaper should be placed inside the oven to absorb any moisture.
Cooking in a Dutch Oven
The Dutch Oven Dude’s advice about Cooking temperature is excellent.
Recipes
Here are some links to Dutch Oven Recipes:
- Dutch-Oven Breakfast Casserole
- The 20 Best Things to Cook When You Get a Dutch Oven
- 17 tasty Dutch oven recipes
- Dutch Oven Dude’s recipes
Master Chef Contest Winners
Drum roll, please … find the winners of the Scouting magazine Dutch Oven Master Chef Contest below. Click on each winning recipe to see photos and find instructions on how to make these on your next campout.
SAVORY Category
- Winner: Katahdin Surprise by Jim Rausch
- First Runner-Up: Dutch-Oven Reuben by Emily Dresslar
- Second Runner-Up: Rib-Sticking Biscuits and Gravy by Mark Daspit
SWEET Category
- Winner: Apple Cheesecake with Caramel Streusel Topping by Lisa Blodgett
- First Runner-Up: Harvest Coffee Cake with Crumble Topping by Ken Selby
- Second Runner-Up: Chocolatey Chocolate Chip Cake with Cream Cheese Frosting by Andrea Kippes
Resources
Here are some links to useful Dutch Oven articles:
- A Dutch-oven cooking primer
- Dutch Oven Cooking by Larry Hoffman
Byron’s Dutch Oven Cooking
Apparently, Byron’s Dutch Oven Cooking site (without a doubt the best resource for Dutch Oven cooking) has been removed from the internet. There are some pages archived in the Internet Way Back Machine here.
The entire site has been reconstituted into a PDF file, downloadable here.
